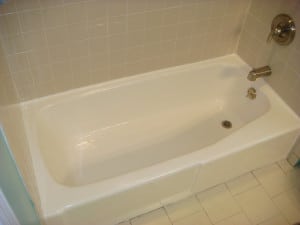
Yuck! Are you are frustrated because your bathtub or shower looks dirty and you just cleaned it? Take these 8 simple steps to apply new caulk and improve the look of your bathtub or shower.

Caulking is an easy Do-It-Yourself (DIY) project that will freshen the look of your tub or shower. Old caulk can crack and cause water to leak behind tile causing water damage to your wall. A further problem with cracks in old caulk is mildew growing around your bathtub or shower giving it an unclean look. If this sounds familiar, it is time to remove the old, damaged caulk and apply fresh, clean new caulk.
What You Need For This Project
Materials
White Vinegar or Mineral Spirits
Non–abrasive Sponge, Lint Free Rags, or Paper Towels
Painter’s Tape
Caulk that is intended for bathroom use
Tools
5–in–1 Painter’s Tool or Putty Knife
Heat Gun (optional)
Utility Knife
Caulking Gun
Steps
1. Remove existing caulk with a putty knife or other sharp tool.
Use a scrapper or a 5-in-1 painters tool to remove old caulk. Take care not to scratch or damage the tub or shower surface in this step. Using water, chemical softeners, heat will help loosen your old caulk. If your existing caulk is a water based, it will crack and break and you scrape. If the caulk is silicone based is will feel rubbery and stretchy as you scrape. If the caulk proves to be stubborn, try using a heat gun to apply heat to the caulk to soften it.
2. Clean the surface to remove old caulk and mold.
After you have removed the old caulk, vacuum the debris and wipe the area clean with a non-abrasive sponge, lint free rag, or paper towel. Clean the surface with White Vinegar or Mineral Sprits.
3. Thoroughly dry the area to prevent mold from growing.
Use a clean, dry link free rag or paper towel to thoroughly dry the cleaned surface.
4. Tape off the area that you are planning to caulk.
Using painter’s tape, mask off both surfaces at the point where you want the edge of the caulk to stop. The joint will look best if you tape a thinner joint, approximately 1/4″ in total width. Press the tape edge down firmly in place.
5. Trim the tip of your caulk at a 45 degree angle.
Using a utility knife, cut the tip of the caulk tube at a 45 degree angle.
6. Load the caulk into the caulk gun, and apply steady pressure as you move along the tub seam.
The goal here is to apply the caulk at a steady speed with the right distribution to cover the joint. If this is your first time using a caulking gun, use a scrap piece of cardboard, or even better, a cardboard box and take a few practice attempts before caulking your tub or shower.
7. Smooth the finished line of caulk with a dampened rag or paper towel, or a wet finger.
Make sure that you smooth your caulk joint before it starts to dry and harden. Wet your finger or rag if you are using latex caulk. Silicone caulk requires wetting your finger or rag with denatured alcohol. Be sure to wear gloves. Run your finger along the fresh caulk pushing the caulk into the joint with slight pressure.
8. Carefully remove the tape and fix any blemishes that are left behind.
Just like smoothing the joint before the caulk dries is important, so is removing the painter’s tape. Remove your Painter’s Tape before the caulk begins to harden. Remove the tape in a slow and steady movement.
Caulking your bathtub or shower is a quick, easy DIY project that will keep it clean and leak-free. The project experts at Northside Tool Rental are happy to assist you with your next caulking project.

