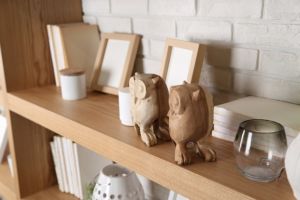
While e-readers have become increasingly popular, bookcases are still high in demand. Bookshelves are versatile, and can store more than just books! They’re perfect for CDs, DVDs, knick-knacks, and even kitchen supplies. They’re also easy to build, and a great weekend project.
Bookshelves can come in a wide variety of shapes and sizes. Our guide teaches how to build a simple bookcase measuring 31”x24”x13”. This plan can be easily scaled to the size and shape you want!
First Thing’s First: Supplies
Materials
- 1 – 12’ 1×12 Board
- 3 – 1×2 Boards
- 1 – ¼ Sheet of ¼” Plywood (at least 24” x 30”)
- 2” Screws
- 1¼” Nails
- 2” Nails
- Wood Glue
Tools You’ll Need
- Measuring Tape
- Pencil
- Safety Equipment (Glasses and Hearing Equipment)
- Square
- Wood Saw (Manual or Electric – Your Preference!)
- Drill
- Nail Gun OR Hammer
- Handheld Sander
Finishing Supplies
- 120 Grit Sandpaper
- Wood Conditioner
- Primer
- Paint and Brushes
How to Build a Simple Bookcase
Now that you’ve gathered all your supplies, it’s time to start building!
Cut Your Boards

1 Top Front – 1×2 at 24”
1 Top Back – 1×12 at 24”
2 Sides – 1×12 at 28¼”
2 Shelves – 1×12 at 20½”
4 Shelf Trim – 1×2 at 19”
2 Bottom Shelf Supports – 1×2 at 11½”
4 Legs – 1×2 at 30¼”
1 – ¼” Sheet of Plywood – 22”x29”
Build the Frame
First, lay your boards down and mark where the joints will be on both the inside and outside. Then, fasten the shelves to the sides using 2” screws and wood glue. Keep a ¾” gap under the bottom shelf. You can place the middle shelf at any height you prefer.
Fasten the Bottom Shelf Supports in the ¾” gap under the bottom shelf, keeping each one flush with their sides.
Attach the Legs
Keeping the outside of each leg flush with tops and edges of the sides, fasten the legs to the sides using 2” screws and wood glue. Don’t forget to fasten the legs to the shelves, as this will add a bit more strength and stability.
Add Shelf Trim
The trim will sit on the faces of the shelf edges. If using natural or reclaimed wood, you may want to consider choosing a contrasting color for these!
Make sure the top edges are flush, and then fasten the shelf trim through the ends of the boards. Use 1¼” nails and wood glue. Do this for all 4 outwards-facing sides of the shelf edges.
Top it Off
Attach the Top Back piece with 2” nails and wood glue. The back edge should be flush to the back of the bookshelf, and there will be a 1” overhang on either side.
Attach the Top Front piece, using 2” nails to fasten through the front-facing trim and into the back top piece.
Back It
Attach the back with wood glue and 1¼” nails. Make sure to glue along the inner edges of the shelves.
Great job!
You’ve just finished construction on your new bookcase. Now it’s time to complete your project.
Finishing and Painting
 Sand the completed bookcase with the 120-grit sandpaper and handheld sander. You can follow this up with 220-grit for a finer finish.
- Fill in any gaps with Wood Filler, if desired.
- If you’re planning on painting your bookshelf, shellac any knots in the wood so that sap doesn’t bleed through the paint.
- Prime and paint the bookshelf, following the instructions from the paint you’ve purchased.
- Let the bookshelf dry per the instructions from your paint’s manufacturer.
Once everything is painted and dry, you’re done! Congratulations! You’ve just finished building a simple bookcase.
Northside Tool Rental
Whether you’re building a bookcase, working on a landscape overhaul, or have a long to-do list around the house, Northside Tool Rental has the right equipment for your project. We’ve got a wide selection of equipment to choose from at competitive rates. Our friendly and knowledgeable staff are more than happy to help you with any questions you may have. Visit us at one of our five convenient Metro Atlanta locations!

