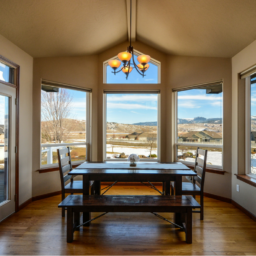
When it comes to painting, you are probably wondering whether you should paint walls or trim first. Ideally, you should start by covering larger areas first such as the ceiling and walls, then you can proceed to painting the trim. For some people, painting the walls first is easier to do, while there are those who begin with the door or window trim before the walls. These techniques come with different advantages, so it is important to understand the pros and cons of each.
Painting the Trim
The best thing about painting the trim first is the ease it comes with since you can prevent having some paint touch the walls. Moreover, it is possible for you to get better results in the paint job when you start with the trim first.
When you paint the trim before the walls, you can ensure total coverage of the rest of the surface to be painted without thinking about annoying spatters. The only downside, though, is that when you mask the woodwork can take so much time. It is also necessary to wait for about 24 hours before the paint dries before you proceed with painting the walls.
Is Masking Really Necessary?
You may be thinking whether you should mask first instead of going free-hand. Generally, you can opt for free-hand painting if you have stead hands. However, if you want professional results, then masking is still a necessity. This way, you can ensure having cleaner edges when you start painting.
To achieve flawless edges using masking tape, then this means you will have to start painting the walls before the trim. It is important to understand that wall paint tends to stick better to the tape easily, as compared to trim paint. What’s more, touchups may be necessary when you have removed the tape.
Based on professionals, you will have to perform certain techniques when it comes to painting interior walls. For instance, you may consider painting the trim initially before you go to the ceiling and walls. Taping the trim off is usually much easier to do than when you have to tape the walls off.
As you paint the trim, there is no need to try to make it the neatest possible. Simply begin with achieving a smoother finish on the surface. In case paint touches the walls, you can simply cover the area later on once you begin painting on that surface.
Tips on Painting the Trim
Here are some tips on how you can paint the trim to attain professional and top-quality results:
- Put a masking tape of the wall’s edges, specifically on the area where the edges and the trim meet. After preparing the area to be painted, you may start using a stick to prepare the paint and stir it well. Keep in mind that before you use any paint, you should stir it first to avoid any bubbles or unsightly bumps on the surface to be painted.
- Use a 2-inch sash brush for painting the trim. Dip the brush into the can of paint and make sure that only at least about a third of the bristles is coated with paint. If you notice that the brush had more paint than you need, simply remove it by tapping two sides of the bristles against the edges of the can. With excessive paint, you will end up losing control and getting spatters on the area.
- When you are ready to start painting the trim, be sure to have the paint guard ready. You should use this and place it at the ceiling molding’s bottom edge, or on the other wall that is directly adjacent to the doorframe and window. Keep the guard in place by holding it with your other hand.
- Gently apply a good amount of paint on the widest portion of the trim. Be sure that when you apply paint, you only use a single stroke and keep it is a single direction to avoid brushmarks. The proper way to apply paint is to press the brush slightly. Make sure that the pressure you apply is just right to cause a slight flex on the bristles. Then, work it slowly and gently to achieve an evenly-applied paint on the area.
- You may use subsequent strokes on an area that is still dry before heading off to the wet portions. This is a great way to prevent lap marks that ruin the smooth and flawless look of the painted trim once it dries up.
- Just slightly raise the brush and slowly work up the edges. With a feathering technique, you can give the strokes a smoother and more even appearance. Then, consider reversing the direction of your paintbrush and apply a light stroke over the previously applied coating you have made.
- Start applying the right amount of paint to the trim’s edges. You may also want to use a thinner or smaller-bristled brush when painting on tight sections.
- For a professional look, add some more paint once the first coat is already dry. Sanding lightly also helps before reapplying some fresh paint.
Quick Tips on How to Paint on Walls
Whether you are a pro or a beginner in painting walls, knowing key techniques can help you obtain a smoother look on this part of your home Generally, you will have to move or cover the pieces of furniture to protect them from any drips or marks from the paint.
Next, get a bucket with some water and toss in detergent powder. Use this for washing the walls to get rid of dirt and debris that will have an unsightly effect once fresh paint is applied on it. Wait for the wall to dry before inspecting it for any dents or holes that need to be covered. You may also use sandpaper to keep the area smooth and just wipe off any dust after sanding.
To keep various areas next to the wall clean and without any spatters of paint, just cover these areas with tape. Once you are ready, you can begin painting the walls, and be sure to start at the top portion of the wall before moving to the other parts. If you need to apply another coating, wait for the first coat to dry before you continue painting again.